python框架flask知识总结
发布时间:2021-06-25 16:32:17
今天带大家复习python框架的相关知识,文中对flask作了非常详细的介绍,对正在学习python的小伙伴们有很好的帮助,需要的朋友可以参考下
一、Flask蓝图目录
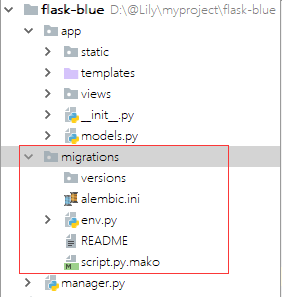
我们之前写的Flask项目都是自己组织的目录结构,其实Flask官方有其推荐的目录结构,以下就是一个符合官方推荐的Flask小型应用的项目结构目录示例,如下:
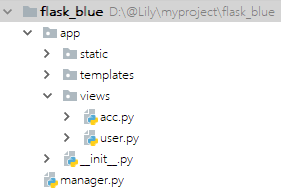
如图,这就是我们建立好的一个目录结构,一层一层的看一下,首先是app目录,它就是我们的主应用程序目录了,其中有一个__init__.py文件,里面的内容如下:
app/init.py
1 2 3 4 5 6 7 8 9 10 11 12 | from flask import Flask
from .views.acc import acc_bp
from .views.user import user_bp
def create_app():
my_app = Flask(__name__)
my_app.register_blueprint(acc_bp)
my_app.register_blueprint(user_bp)
return my_app
app/__init__.py
|
__init__.py就是构建app的一个函数,并且将views中的蓝图注册进去了。
接下来看static目录,这个目录从字面意思就可以理解了,是我们的static静态文件存放目录。
然后就是templates目录,即模板存放目录。
views目录,主角终于登场了,这里存放的就是视图函数文件,也就是我们Blueprint,每一个文件就是一个Blueprint,如下:
views/acc.py
1 2 3 4 5 6 7 8 9 | from flask import Blueprint
acc_bp = Blueprint('acc', __name__)
@acc_bp.route("/acc")
def accfunc():
return "my_app.acc"
views/acc.py
|
views/user.py
1 2 3 4 5 6 7 8 9 | from flask import Blueprint
user_bp = Blueprint('user', __name__)
@user_bp.route("/login")
def user_login():
return "my_app.user"
views/user.py
|
接下来就是关键性的一个文件manager.py,项目的启动文件,内容如下:
manager.py
1 2 3 4 5 6 7 8 | from app import create_app
my_app = create_app()
if __name__ == '__main__':
my_app.run()
manager.py
|
二、Flask-SQLAlchemy
1、安装
1 | pip install Flask-SQLAlchemy
|
2、接下来基于上面的Flask项目,我们要加入Flask-SQLAlchemy让项目变得生动起来
2.1 加入Flask-SQLAlchemy第三方组件
app/__init__.py
1 2 3 4 5 6 7 8 9 10 11 12 13 14 15 16 17 18 19 20 21 22 23 24 25 26 27 28 | from flask import Flask
from flask_sqlalchemy import SQLAlchemy
db = SQLAlchemy()
from .views.acc import acc_bp
from .views.user import user_bp
def create_app():
my_app = Flask(__name__)
my_app.config["SQLALCHEMY_POOL_SIZE"] = 5
my_app.config["SQLALCHEMY_POOL_TIMEOUT"] = 15
my_app.config["SQLALCHEMY_TRACK_MODIFICATIONS"] = False
db.init_app(my_app)
my_app.register_blueprint(acc_bp)
my_app.register_blueprint(user_bp)
return my_app
app/__init__.py
|
2.2 在app目录下建立models.py(ORM模型文件)
app/models.py
1 2 3 4 5 6 7 8 9 10 11 12 13 14 15 16 17 18 19 20 21 22 23 24 25 26 27 | from app import db
class Users(db.Model):
__tablename__ = 'users'
id = db.Column(db.Integer, primary_key=True)
name = db.Column(db.String(32))
password = db.Column(db.String(32))
if __name__ == '__main__':
from app import create_app
my_app = create_app()
with my_app.app_context():
db.drop_all()
db.create_all()
app/models.py
|
2.3 登录视图函数
还记不记得我们在sqlalchemy中手动打开会话 db_session
1 2 3 | from sqlalchemy.orm import sessionmaker
Session = sessionmaker(engine)
db_session = Session()
|
现在不用了,因为 Flask-SQLAlchemy 也已经为我们做好会话打开的工作
1 2 3 4 5 6 7 8 9 10 11 12 13 14 15 16 17 18 19 20 21 22 23 24 25 26 27 28 29 30 | from flask import Blueprint, request, render_template
user_bp = Blueprint('user', __name__)
from app.models import Users
from app import db
@user_bp.route("/login", methods=['GET', 'POST'])
def user_login():
if request.method == 'POST':
username = request.form.get('username')
password = request.form.get('password')
db.session.add(Users(name=username,password=password))
db.session.commit()
user_obj = Users.query.filter(Users.name == username and Users.password == password).first()
if user_obj:
return f"{user_obj.name}登录成功"
return render_template("login.html")
views/user.py
|
2.4 登陆页面
1 2 3 4 5 6 7 8 9 10 11 12 13 14 15 16 | <!DOCTYPE html>
<html lang="en">
<head>
<meta charset="UTF-8">
<title>Title</title>
</head>
<body>
<form method="post" action="">
<input type="text" name="username">
<input type="password" name="password">
<input type="submit">
</form>
</body>
</html>
templates/login.html
|
三、Flask-Script
1、安装
2、接下来再基于上面的项目,加入Flask-Script,使我们可以用命令启动项目
其实本部分就是为下面的Flask-Migrate做铺垫,Flask-Script 顾名思义就是 Flask 的脚本。你是否还记得Django的启动命令呢?没错,就是 python manager.py runserver,其实Flask也可以做到,基于 Flask-Script 就可以了。
3.1 将Flask-Script加入到Flask项目中
1 2 3 4 5 6 7 8 9 10 11 12 13 | from flask_script import Manager
from app import create_app
my_app = create_app()
manager = Manager(my_app)
if __name__ == '__main__':
manager.run()
manager.py
|
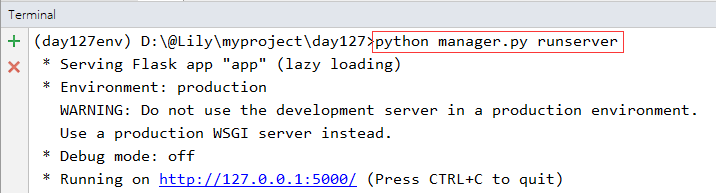
3.2 使用命令启动Flask项目
1 | python manager.py runserver
|
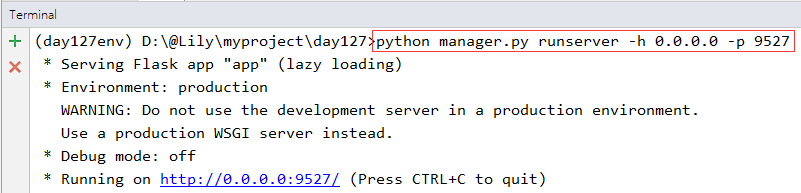
3.3 启动Flask项目,并更改配置参数(监听的IP地址和端口号)
1 | python manager.py runserver -h 0.0.0.0 -p 9527
|
3.4 高级操作 - 自定制脚本命令
方式一:@manager.command
1 2 3 4 5 6 7 8 9 10 11 12 13 14 15 16 17 18 19 | from flask_script import Manager
from app import create_app
my_app = create_app()
manager = Manager(my_app)
@manager.command
def runflask(arg):
print(arg)
if __name__ == '__main__':
manager.run()
manager.py
|
执行命令:
1 | python manager.py runflask 22
|
结果如下图:

执行命令:
1 2 | python manager.py talk -n 你 -s 厉害
python manager.py talk --name 我 --say 厉害
|

四、Flask-Migrate
1、安装
1 | pip install Flask-Migrate
|
2、继续基于上面的项目,使Flask项目支持makemigration和migrate
4.1 将 Flask-Migrate (注意:Flask-Migrate要依赖Flask-Script组件)加入到项目中
1 2 3 4 5 6 7 8 9 10 11 12 13 14 15 16 17 18 19 20 21 22 23 24 25 26 27 28 29 30 31 32 33 34 35 36 37 38 39 40 | from flask_script import Manager
from flask_migrate import Migrate, MigrateCommand
from app import create_app
my_app = create_app()
manager = Manager(my_app)
from app import db
Migrate(my_app, db)
manager.add_command("database", MigrateCommand)
@manager.command
def runflask(arg):
print(arg)
@manager.option("-n", "--name", dest="name")
@manager.option("-s", "--say", dest="say")
def talk(name, say):
print(f"{name}可真{say}")
if __name__ == '__main__':
manager.run()
manager.py
|
4.2 执行数据库初始化指令
1 | python manager.py database init
|
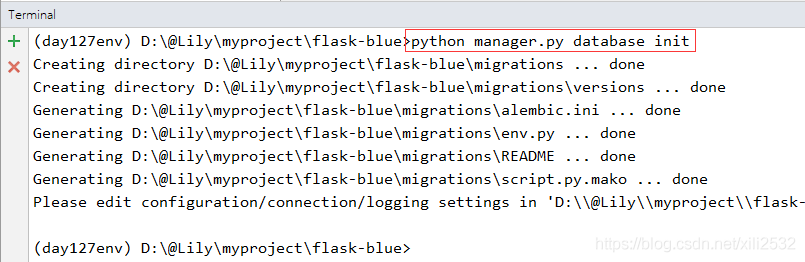
此时你会发现你的项目目录中出现了一个migrations目录,如下图:
4.3 执行数据库迁移指令
1 2 | python manager.py database migrate
python manager.py database upgrade
|
结果如下图:
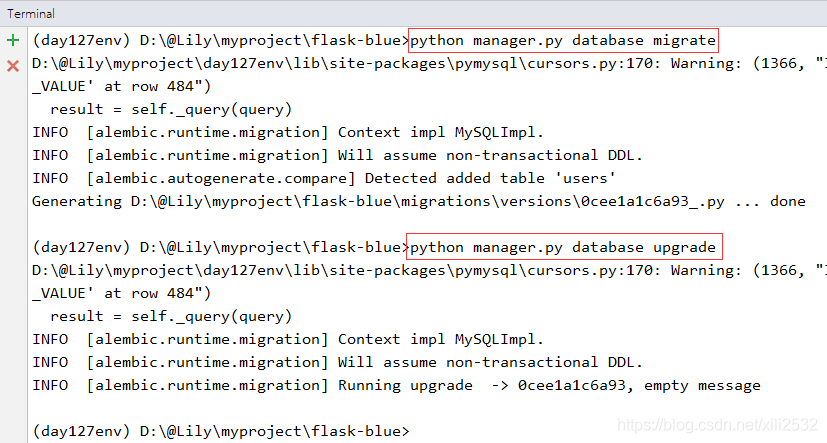
此时你会发现数据库中出现了一个users表。
到此这篇关于python框架flask知识总结的文章就介绍到这了